
Whether you’re moving your existing WordPress site to a new hosting provider or switching from another CMS to WordPress, the process can be smooth and stress-free when done the right way. A well-planned WordPress migration ensures your website remains accessible, secure, and intact throughout the transition. In this guide, you’ll learn how to migrate a WordPress site effortlessly, from preparation and tools to testing and troubleshooting.
Why Consider a WordPress Migration?
There are several reasons why businesses choose to migrate their WordPress website to a new host or move from another platform to WordPress:
- Better performance: Faster load times and optimized servers improve user experience and SEO.
- Enhanced security: A secure hosting environment protects your site from malware and downtime.
- Improved scalability: As your business grows, you need hosting that can handle increased traffic and data.
- More control and flexibility: Migrating to WordPress from another CMS gives you complete ownership of your website and content.
No matter the reason, migrating properly ensures minimal downtime and avoids data loss.
Understanding the Migration Process
In simple terms, migration means moving your website’s files, database, and configurations from one location to another. For WordPress websites, this could mean:
- Transferring files from one hosting provider to another.
- Moving your website to a different server setup.
- Rebuilding your site on WordPress from another platform like Wix, Squarespace, or Joomla.
Each type of migration requires careful planning to maintain your website’s structure, SEO, and functionality.
When to Consider Professional Migration Services
While migration plugins make the process easier, professional help can save you time and stress, especially if your website is large, complex, or eCommerce-based.
A professional WordPress migration service like Seahawk Media ensures:
- Zero downtime
- Secure data transfer
- Complete setup and testing
- SEO preservation
- Ongoing technical support
If you’re short on time or unsure about handling technical steps, consider hiring a WordPress migration expert to handle everything from start to finish.
Seamless WordPress Migration, Done for You
Skip the technical hassle. Our professionals ensure a smooth, zero-downtime transfer to your new host or platform.
Recommended Tools for WordPress Migration
Here are some reliable tools that simplify both types of migrations:
- All-in-One WP Migration: Ideal for beginners, simple drag-and-drop migration.
- Duplicator Pro: Excellent for moving larger sites and manual backups.
- Migrate Guru: Cloud-based tool with automated migration features.
- WP Migrate: Great for database-focused migrations.
- FTP Clients (FileZilla): For manual uploads and file management.
- phpMyAdmin: To create and import databases.
These tools can save time and minimize errors during your migration process.
Steps to Migrate a WordPress Website to a New Host
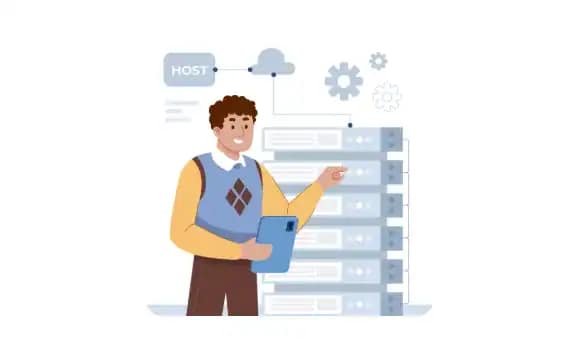
When you’re migrating an existing WordPress site to a new host, the key goal is to ensure your website remains online, all data is transferred accurately, and your visitors experience no interruption.
Step 1: Pre-Migration Checklist
Before you start, go through this quick checklist:
- Back up your website files and database. Use a plugin like BlogVault or manually back up through your hosting cPanel.
- Choose a reliable hosting provider. Look for uptime guarantees, server performance, WordPress optimization, and support.
- Set up your new hosting account. Create a new database that will store your WordPress data.
- Check your domain and DNS settings. Note down the current configuration for later updates.
- Notify your current host if they require any steps before migration.
Taking these steps ensures that even if something goes wrong, you can restore your site safely.
Step 2: Create a New Database
To ensure your website runs smoothly on the new hosting server, you’ll need to create a fresh database that stores all your WordPress data. This database serves as the backbone of your site, seamlessly connecting content, settings, and functionality.
- Log in to your hosting account: Access your new hosting dashboard to begin.
- Open phpMyAdmin or control panel: Create a new database within your hosting environment.
- Add a new user: Assign full permissions to ensure proper access.
- Save your credentials: Note your database name, username, and password. You’ll need them later.
Step 3: Move Your WordPress Files
Once your new database is ready, the next step is to transfer your WordPress files to the new hosting server. You can do this manually or with the help of migration plugins. The goal is to move your website’s core files, themes, plugins, and content without losing any data.
Option 1: Manual Method
If you prefer hands-on control:
- Use an FTP client like FileZilla to download all your website files from the old host.
- Then, export your existing database using phpMyAdmin.
- Next, upload these files to your new hosting server and import the database into your newly created one.
This approach gives you complete control but requires careful attention.
Option 2: Plugin Method
For a simpler and faster solution, use a migration plugin like Duplicator, All-in-One WP Migration, or Migrate Guru. These tools automatically package and transfer your site’s files and database, reducing manual steps and potential errors.
Step 4: Update the wp-config.php File
Your wp-config.php file connects your WordPress site to its database. Update this file on the new server with:
- Database name
- Username
- Password
- Database host (usually “localhost”)
Once done, your WordPress site will be able to read from the new database.
Step 5: Update DNS and Test Your Website
After moving your files and database:
- Update your domain name system (DNS) settings to point your domain to the new hosting server.
- Allow up to 48 hours for DNS propagation to take effect.
- Test your website to ensure everything works properly, check for missing images, broken links, and plugin conflicts.
Once verified, your WordPress migration to the new host is complete.
Common Issues During Migration (and How to Fix Them)
Even with proper planning, a few challenges may appear during your WordPress migration. Identifying them early helps you troubleshoot quickly and keep your website running smoothly. Here are some common problems and their easy fixes.
- Database Connection Errors: If your site shows an error message, double-check the
wp-config.phpfile. Ensure the database name, username, password, and host details are correct.
- File Permission Issues: Incorrect permissions can cause upload or display errors. Set folders to 755 and files to 644 to restore access.
- Broken URLs or Missing Images: After migration, some links may break. Use the Better Search Replace plugin to update old URLs within your database.
- Theme or Plugin Conflicts: Deactivate all plugins, then reactivate them one by one to identify the source of the conflict.
- Slow Website Performance: If your site loads slowly, use caching plugins and image optimization tools to improve speed on your new server.
Steps to Migrate from Another Platform or CMS to WordPress
Migrating from another CMS (like Wix, Squarespace, or Joomla) to WordPress gives you full ownership, customization, and better SEO control. However, it requires a slightly different process.
Step 1: Choose a Hosting Provider and Install WordPress
Start by selecting a WordPress-friendly hosting plan. Most providers offer one-click WordPress installations. Once installed, log in to your WordPress dashboard.
Step 2: Export Content from Your Existing Platform
Before moving to WordPress, you’ll need to export your website content from your current platform. This step ensures that all your posts, pages, and media files are ready for import into WordPress. Each CMS offers different export methods, so choose the one that fits your platform.
- Wix/Squarespace: Export your posts and images manually or through an XML file, if the platform supports it.
- Blogger: Use the built-in Export Tool to download your entire site as an XML file.
- Joomla/Drupal: Install migration extensions such as FG Joomla to WordPress or FG Drupal to WordPress to export your content easily.
Step 3: Import Content into WordPress
Once your content is exported, the next step is to import it into your new WordPress site. This process ensures all your posts, pages, and media are transferred and displayed correctly. WordPress provides built-in tools and plugins to make this transition simple and efficient.
- Access the WordPress Dashboard: Log in to your WordPress admin panel to begin the import process.
- Navigate to Tools → Import: From the left-hand menu, go to Tools and select Import to view available import options.
- Install the Importer Plugin: Choose the platform you’re migrating from and install the corresponding importer tool.
- Upload Your Exported File: Select the XML or export file from your computer and upload it to WordPress.
- Verify Imported Content: After import, review your website to ensure all posts, pages, and images display properly and match your original site’s layout.
Step 4: Set Up Themes and Plugins
After successfully importing your content, it’s time to design and enhance your WordPress website. Choosing the right theme and plugins will ensure your site looks professional, functions smoothly, and aligns with your brand identity.
Choose a Suitable Theme: Pick a WordPress theme that best represents your brand and style. You can customize it easily using the WordPress Customizer or a page builder like Elementor to adjust layouts, colors, and typography.
Install Essential Plugins: To boost functionality, install a few must-have plugins:
- Rank Math or AIOSEO for SEO optimization.
- WPForms for creating user-friendly contact forms.
- SolidWP (formerly iThemes Security) for security and performance.
- BlogVault for reliable backups and easy restoration.
With these tools, your migrated content evolves into a fully functional, optimized, and secure WordPress website ready for launch.
Step 5: Set Up Redirects and Preserve SEO
Once your new WordPress site is live, it’s crucial to protect your SEO rankings and ensure search engines recognize your updated URLs. Proper redirects and link updates help maintain your visibility and organic traffic after migration.
- Redirect Old URLs: Use a plugin like Redirection to map old URLs to their new WordPress counterparts. This ensures visitors and search engines land on the right pages.
- Update Internal Links: If your URL structure has changed, review and update all internal links throughout your website to avoid broken paths.
- Submit a New Sitemap: Generate and submit your new XML sitemap to Google Search Console to help Google index your updated pages quickly.
- Monitor SEO Performance: Keep an eye on your crawl errors and broken links using tools like Google Search Console. This helps you maintain consistent rankings and avoid traffic loss.
Pro Tips for a Smooth WordPress Migration
Even with a solid plan, a few smart steps can make your WordPress migration smoother and more reliable. These practical tips will help you maintain performance, security, and uptime after the move.
- Test Before Going Live: Before making your site public, thoroughly test it in a staging environment or on a temporary domain. This helps identify and fix issues without affecting your live site.
- Keep Reliable Backups: Always keep at least two complete backups of your website files and database. This safety net ensures a quick recovery if anything goes wrong during migration.
- Update Plugins and Themes: After migration, update all plugins and themes to their latest versions. Doing so prevents compatibility or functionality issues.
- Optimize Your Hosting Setup: Enhance performance by utilizing caching tools and a CDN to expedite page load times.
- Monitor Website Performance: Finally, keep an eye on uptime and performance using tools like UptimeRobot or Google Analytics to ensure ongoing stability.
Conclusion
Migrating a WordPress site or moving from another CMS to WordPress doesn’t have to be overwhelming. With the right plan, tools, and preparation, you can migrate your website to a new host or switch to WordPress smoothly and efficiently.
By following the steps outlined above, you’ll ensure your site remains live, secure, and optimized during the entire process.
And if you’d rather focus on your business while experts handle the technical side, consider professional WordPress migration services for a seamless, worry-free transition.
WordPress Migration FAQs
How do I migrate my WordPress site to a new host?
To migrate your WordPress site, back up all the files and your site’s database, then upload them to your new web host. Finally, update your wp config details to connect to the new database.
Can I perform a WordPress site migration manually?
Yes, you can complete a WordPress site manually by downloading your WordPress site files, exporting the database file, and uploading everything to the new web hosting account.
What is the role of the WordPress database during migration?
The WordPress database stores all your website data, including posts, settings, and users. It must be imported into the new web host’s database manager under the database section.
How do I import my database into the new WordPress installation?
Go to phpMyAdmin, open the import tab, and upload your SQL file. This process restores your old site’s data to the new site.
What should I check after manual migration?
Verify your site URL, domain name server, and site speed. Also, test links and media to ensure the live WordPress site works correctly on the destination site.
Can I move my website without using plugins?
Yes, manual migration allows you to transfer your WordPress site manually by handling the upload process, database credentials, and PHP file updates within the root directory.
What if my website doesn’t load after migration?
Check the database user, current hosting account, and new WordPress host for proper connections. Additionally, confirm the server IP address and the website’s domain settings to ensure a successful domain transfer and hosting service setup.